
A job is ready to print and then, at the last minute, something’s not quite right — the colours are a touch too warm, the contrast looks flat, or the whole thing is just a shade too dark. Normally that means going back to a photo editor, tweaking the file, re-exporting and starting again. If you’re on a Canon imagePROGRAF printer, there’s a quicker way: a full set of colour adjustment tools built straight into the print driver, so you can fix the job right there before it prints.
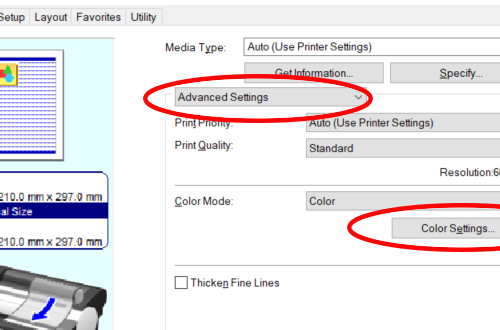
On Windows, open the print settings and, on the Main tab, look for Advanced Settings, then click the Color Settings… button just below it. That opens a dedicated adjustment window with no need to touch any other software.
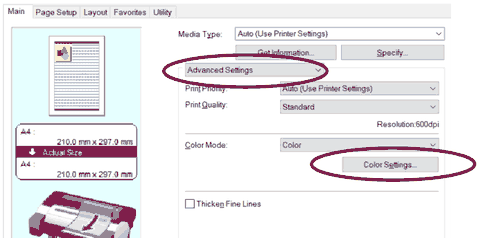
The Main tab of the Canon imagePROGRAF Windows driver — Advanced Settings and the Color Settings button, both circled, are where this tool is hiding.
Mac users get the same tool, just accessed slightly differently: instead of a separate driver window, it sits inside the standard print dialog under a Color Options panel. Same sliders, same result, just one click further into the Print dialog rather than a driver preferences screen.
Once the Color Settings window (or the Mac Color Options panel) is open, you’ve got five sliders to work with: Cyan, Magenta and Yellow for colour balance, plus Brightness and Contrast. Nudge them until the preview looks right, hit OK, and the job prints with your adjusted values applied — no separate editing software, no re-exporting the file, no waiting for a reprint to see if it worked.
Here’s roughly what each control fixes: a contrast tweak brings back detail that’s gone muddy or flat; correcting the colour balance pulls out an unwanted warm or cool cast; and a brightness adjustment rescues a job that’s come out darker or lighter than intended.
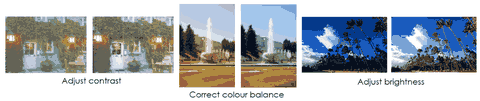
The same three adjustments in practice: contrast, colour balance and brightness, each shown before (left) and after (right).
Without this tool, spotting a colour problem right before printing usually means one of two things: going back to the original file in a photo editor and starting the export again, or just printing it anyway and hoping it’s close enough — only to find out it isn’t, and having to reprint on a fresh length of media. Making the fix in the driver itself skips both of those. It’s not a replacement for proper colour management on a job that needs to be exactly right, but for a last-minute tweak with no time or software to hand, it’s the fastest way to get a print you’re happy with first time.
If you’re on an Epson or HP printer and aren’t sure whether your driver has an equivalent tool, or where to find it, get in touch and we’re happy to talk you through it.
As a reminder, we’re now in our 36th year supplying large format printer solutions and have sold over 7,000 printers to architects, photographers and signage businesses across the UK — more about us here.
Looking forward to hearing from you.